
How I Made Over My Guest Bathroom for Less than $700

Hi friends! I promise I’m going to do better at updating the blog this year. I’ve kept myself busy with projects and my normal graphic design work, and between that and home school with the kiddo, I rarely find time to write up how I do things. My goal is to do that more often! I need the distraction from life.
My daughter’s bathroom, and the bathroom we use for guests, was a pretty lackluster space. I decided I wanted to tackle a makeover here as my first project for the year. I’ve been planning it since last year but I needed to save some funds.

The tile appeared to be from when the house was built, and the grout was pretty stained. I wasn’t a fan of the brown tones in the tile, and I really didn’t care for the dark brown painted vanity. While the granite countertop isn’t what I would have picked, I decided to design around it and make it look more purposeful. I also wasn’t too excited about the old bronze light fixture.

Overall, this bathroom made me sad because it felt old and dark. It didn’t reflect my daughter’s vibrant personality, and I wanted it to be more welcoming for guests. We won’t have the funds to completely gut it for a few years, so I decided a mini-makeover would make it more cheerful in the meantime.
I made some trusty Photoshop mockups with my overall ideas to start planning how I could redo the space. I chose to use the shower curtain as inspiration, because my daughter loves the pattern. Here are the mockups I made to plan the space:

They are not perfect, but they helped me visualize the space so that I could get a better handle of what it would look like and what would make the most impact. I decided to keep the existing mirrors and paint them to save money. I also wanted to paint the vanity a more vibrant color. I had some reject paint left over from when I painted my kitchen island, and it happened to match the teal in the shower curtain perfectly. I liked the idea of wallpapering the back wall for a fun accent, and fell in love with some animal artwork I found online. Here is everything I used to start on the room:

Once I had a plan, I decided to try to clean the tile floor first. I tried grout cleaner. I tried baking soda concoctions and a drill brush. Nothing made it look better. It still looked old and gross. SO, I decided to try something slightly risky to make it look better. I’ve never painted tile before, but we eventually want to gut this bathroom anyway. I decided it couldn’t look worse, so I did a ton of research.

I landed on this product by Rustoleum. It’ a home interior floor coating kit. I read tons of reviews and they all were raving. The people at Home Depot even said they sell a ton of this stuff and hear great things. So I decided to give it a go. I chose Pearl Gray because I thought it looked the most neutral. It was a bit cooler than I expected, but it looked ok so I went with it!

I started by cleaning the floor with the cleaner included in the paint kit. I used an old rag and was as thorough as I could be, getting into all of the cracks and crevices. You can see in the close up how lovely the tile and grout were before painting.

Then I taped off all of the edges with Frog Tape and made sure everything but the tile was protected. Honestly, taping everything off took more time than actually painting the floor. I started working in small areas, making sure to maintain a wet edge. I used a flexible brush to get in the grooves of the grout, and then a roller for the flat surface of the tile.


My floor ended up requiring two coats, and I gave it 6 hours of drying time in between. Then I waited 12 hours to do the top coat in the same manner. Once the top coat was complete, I let it dry completely for 24 hours, and we didn’t really walk on it or move things onto it for a good 4 days to let the paint cure. Then I took off the tape and it already looked way better in this room!

Once I peeled off the tape, there were a few gaps between the tile and quarter round that became more apparent. So I got some trusty caulk and went about sealing the gaps. Note… make sure you get paintable caulk. Learn from my mistakes.

Once the floors were done I went ahead and tackled the mirrors. I simply frog taped the glass, and spray painted. I used this fun pink from Krylon, and propped the mirrors up on cardboard boxes. My husband always gets mad at me because I kill the grass with spray paint, but it’s for a worthy cause so I don’t care.


And then we took off the old light fixture…. to reveal an interesting situation of electrical work behind the plate of the old fixture. It was bigger than the new plate. And there was a random pipe. Luckily my husband is a wizard and patched the drywall with a piece of wood behind it in the wall and a crisis was averted.


When the light fixture was up and I could see in the room again, I decided to go ahead and tackle painting the vanity. We took off all of the doors and hardware, making sure to keep them in order. I cleaned everything with TSP Solution, gave it a light sanding, and then wiped it all down with a dusting cloth. This was painted before so I didn’t really feel like priming was necessary, and Sherwin Williams Trim Enamel is awesome stuff.

These little riser things for painting are your best tool. I propped up the doors on them to make it easier to paint the sides. I used a flexible brush for the crevices of the doors and cabinet base, and a roller for doors and cabinets for all of the flat areas. Everything only took two coats!


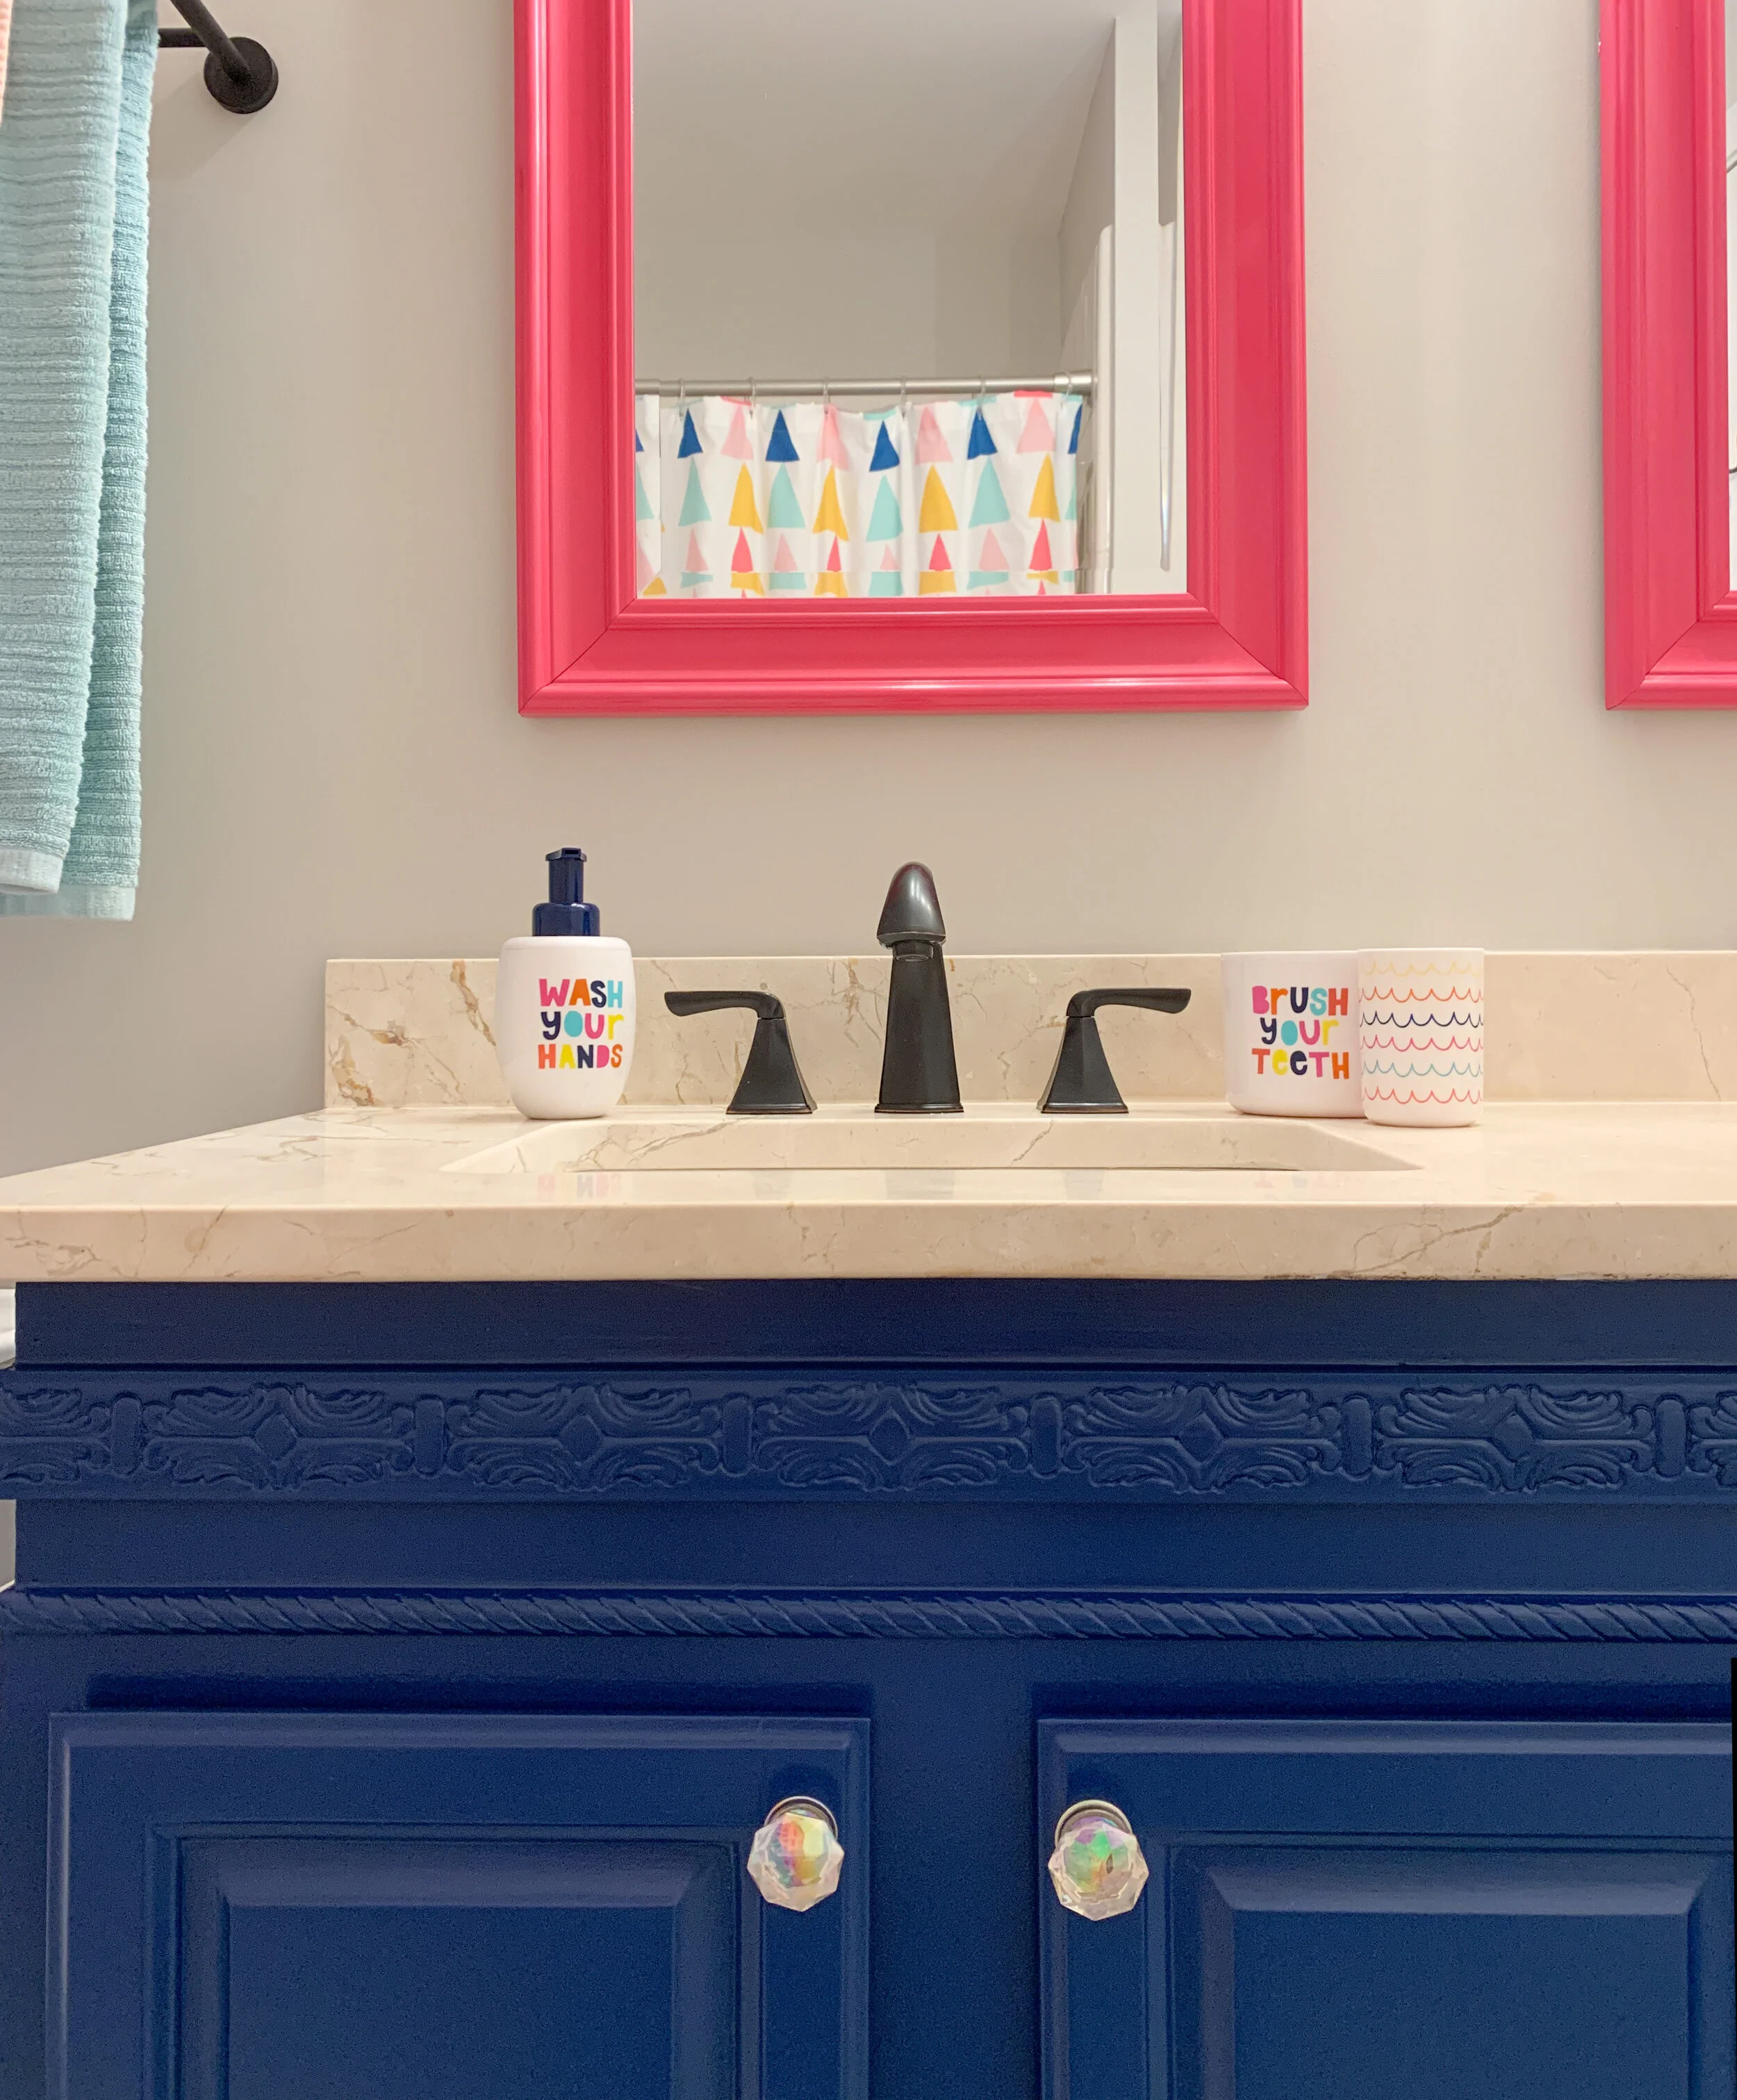
After letting everything dry for a few days, we put the cabinet back together and put on the new knobs. My daughter is VERY excited about the knobs because she says they look like magic crystals. Ha! My mom and dad gave me a gift card to Anthropologie for Christmas and I’m a weirdo because I used it on cabinet knobs.
After the cabinet was back together, I went ahead and repainted the ceiling, and touched up the gray walls and the white trim to make sure they looked shiny and new.
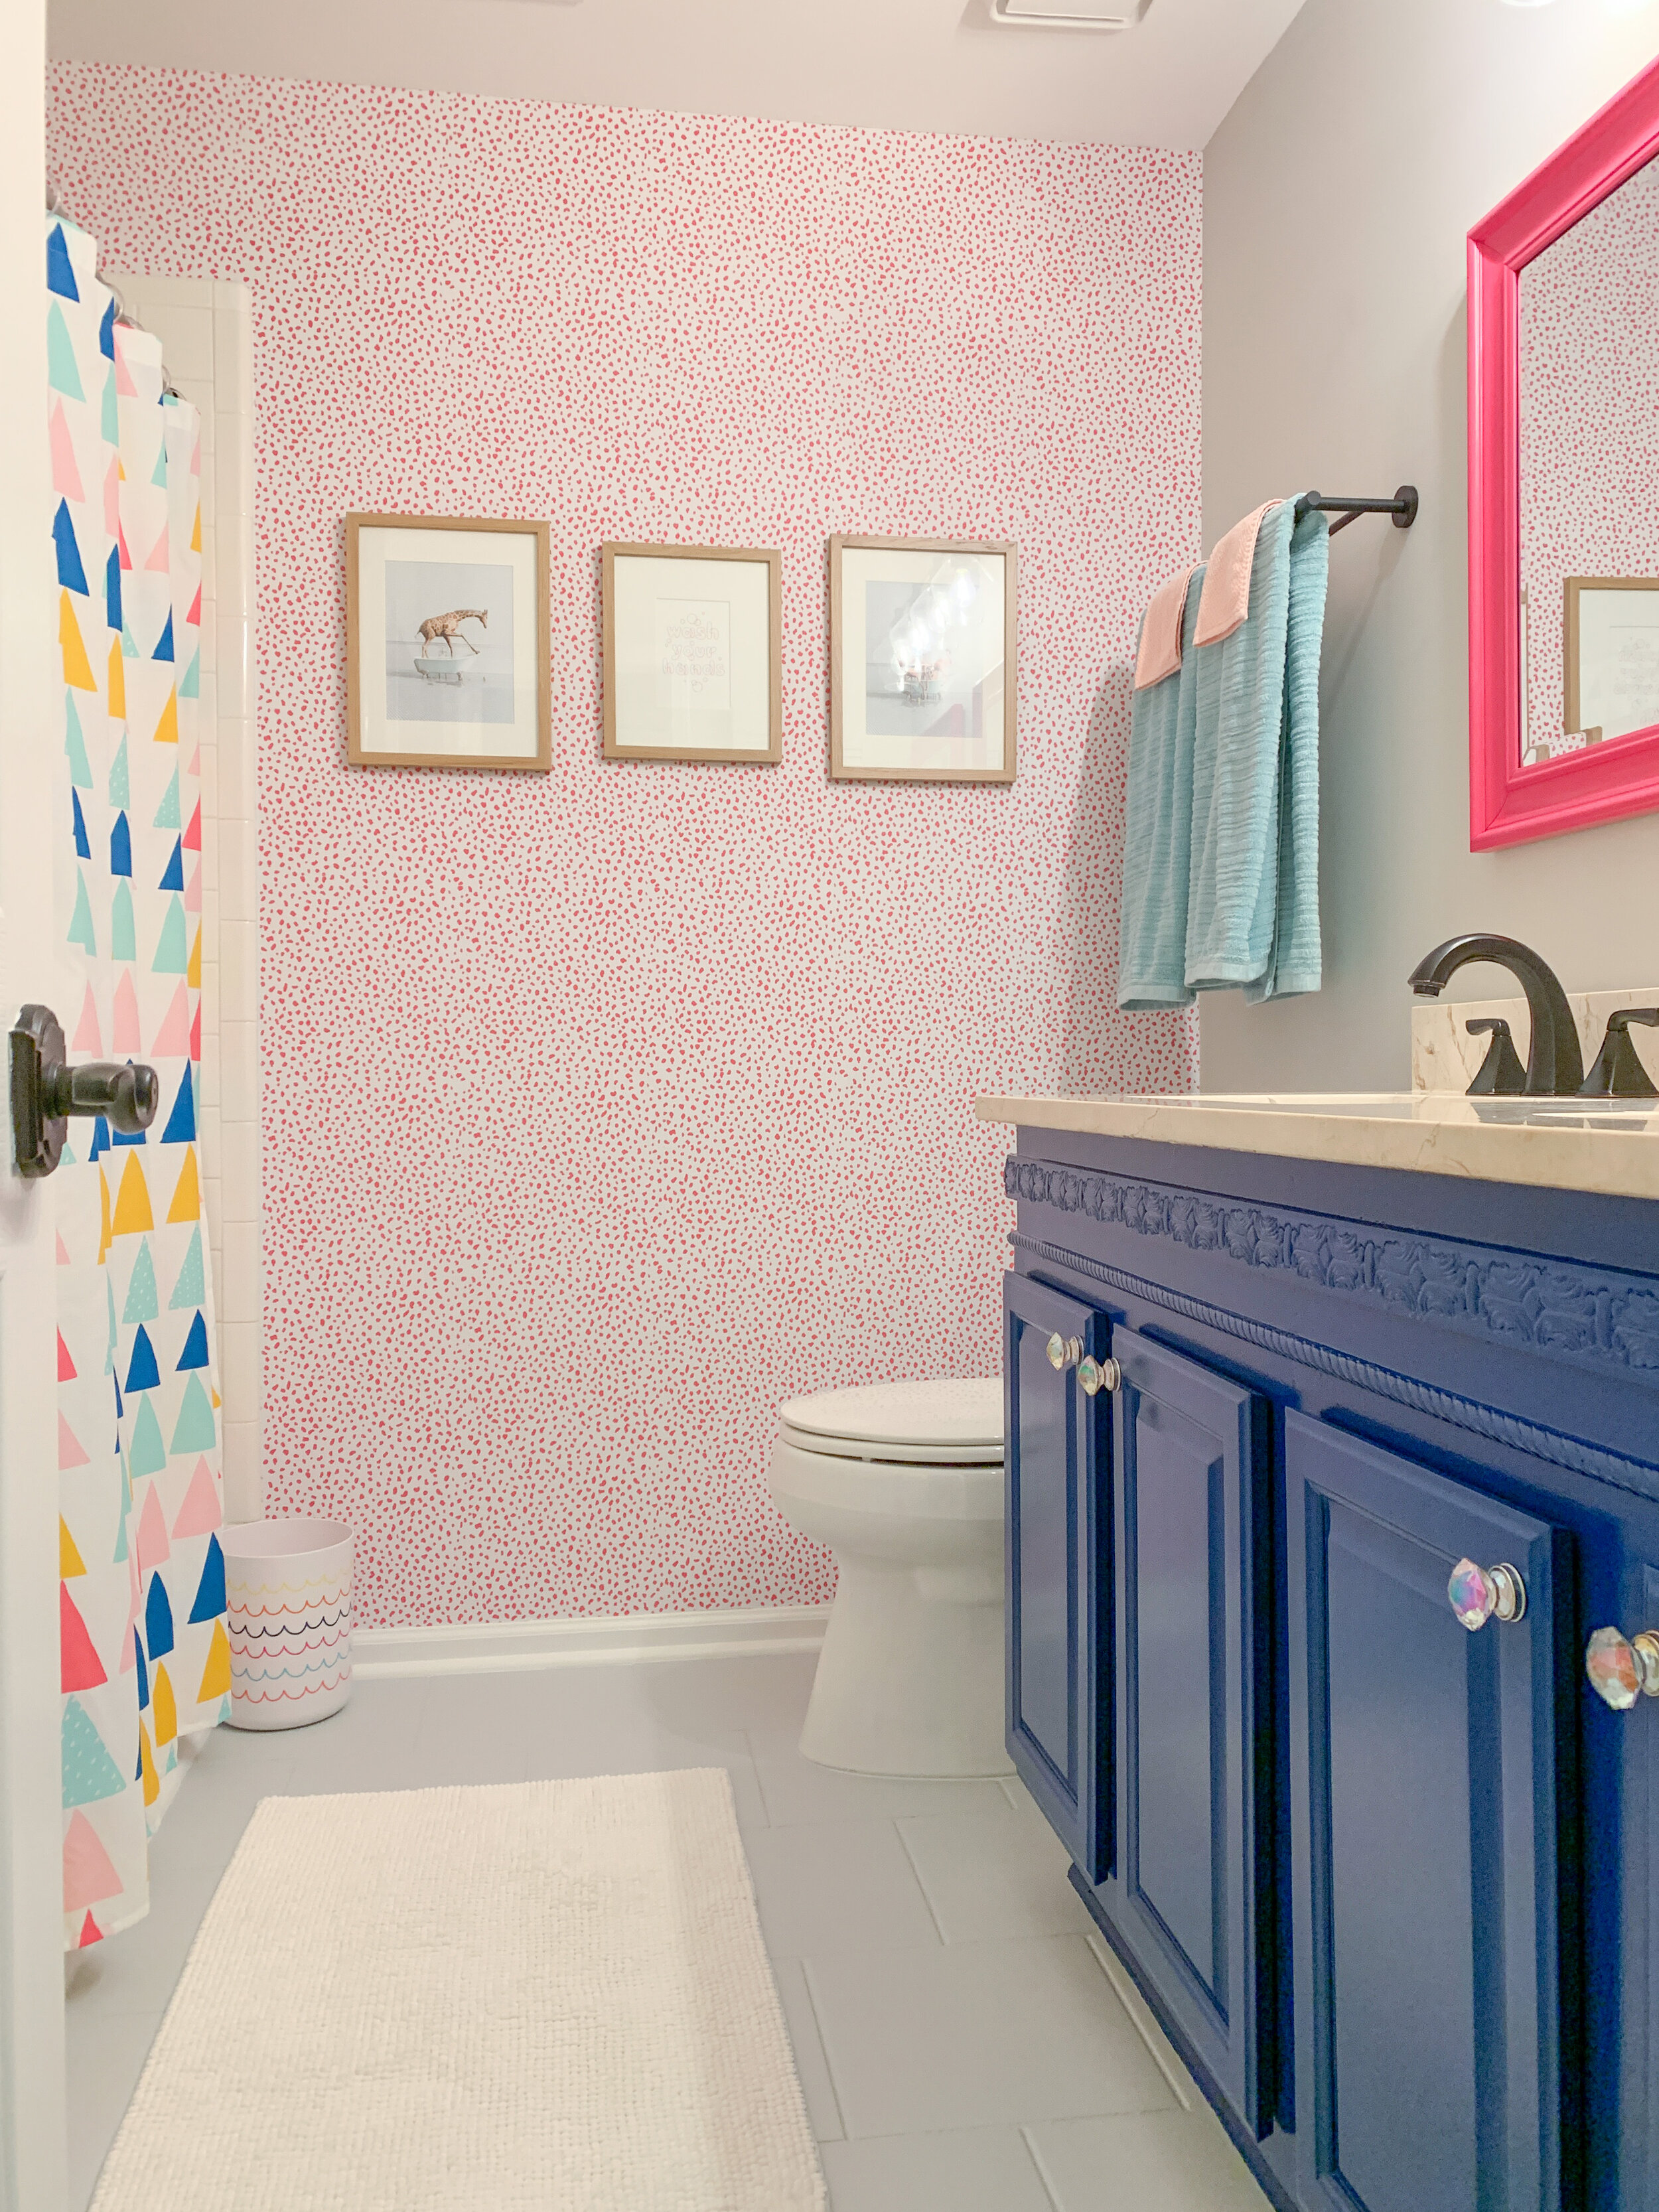
Then came the fun part… hanging the wallpaper. My in-laws were super nice and gifted me the wallpaper for Christmas. If you are noticing a theme here, my family knows I love home decor and most of them contribute to my crazy design ideas for holidays. As part of the gift, my husband also agreed to help me hang it without complaining, which was a Christmas miracle.

I used the same technique as I used in my Master Bath Makeover. First we measured a level line from the side of the wall, leaving a bit of an overhang in case the wall wasn’t completely level. I used a wallpaper smoothing tool as we slowly peeled the backing off from the top down. It helped to have my husband holding it taught while I smoothed down. Once we got the first strip down, we just kept going to the left of the room, leaving the complicated cuts for last.

The corners were somewhat tricky around the shower, but using a sharp blade, we figured it out. Once all of the paper was up and smoothed out, we used an Exacto Knife to trim off the excess with a straight edge as a guide.

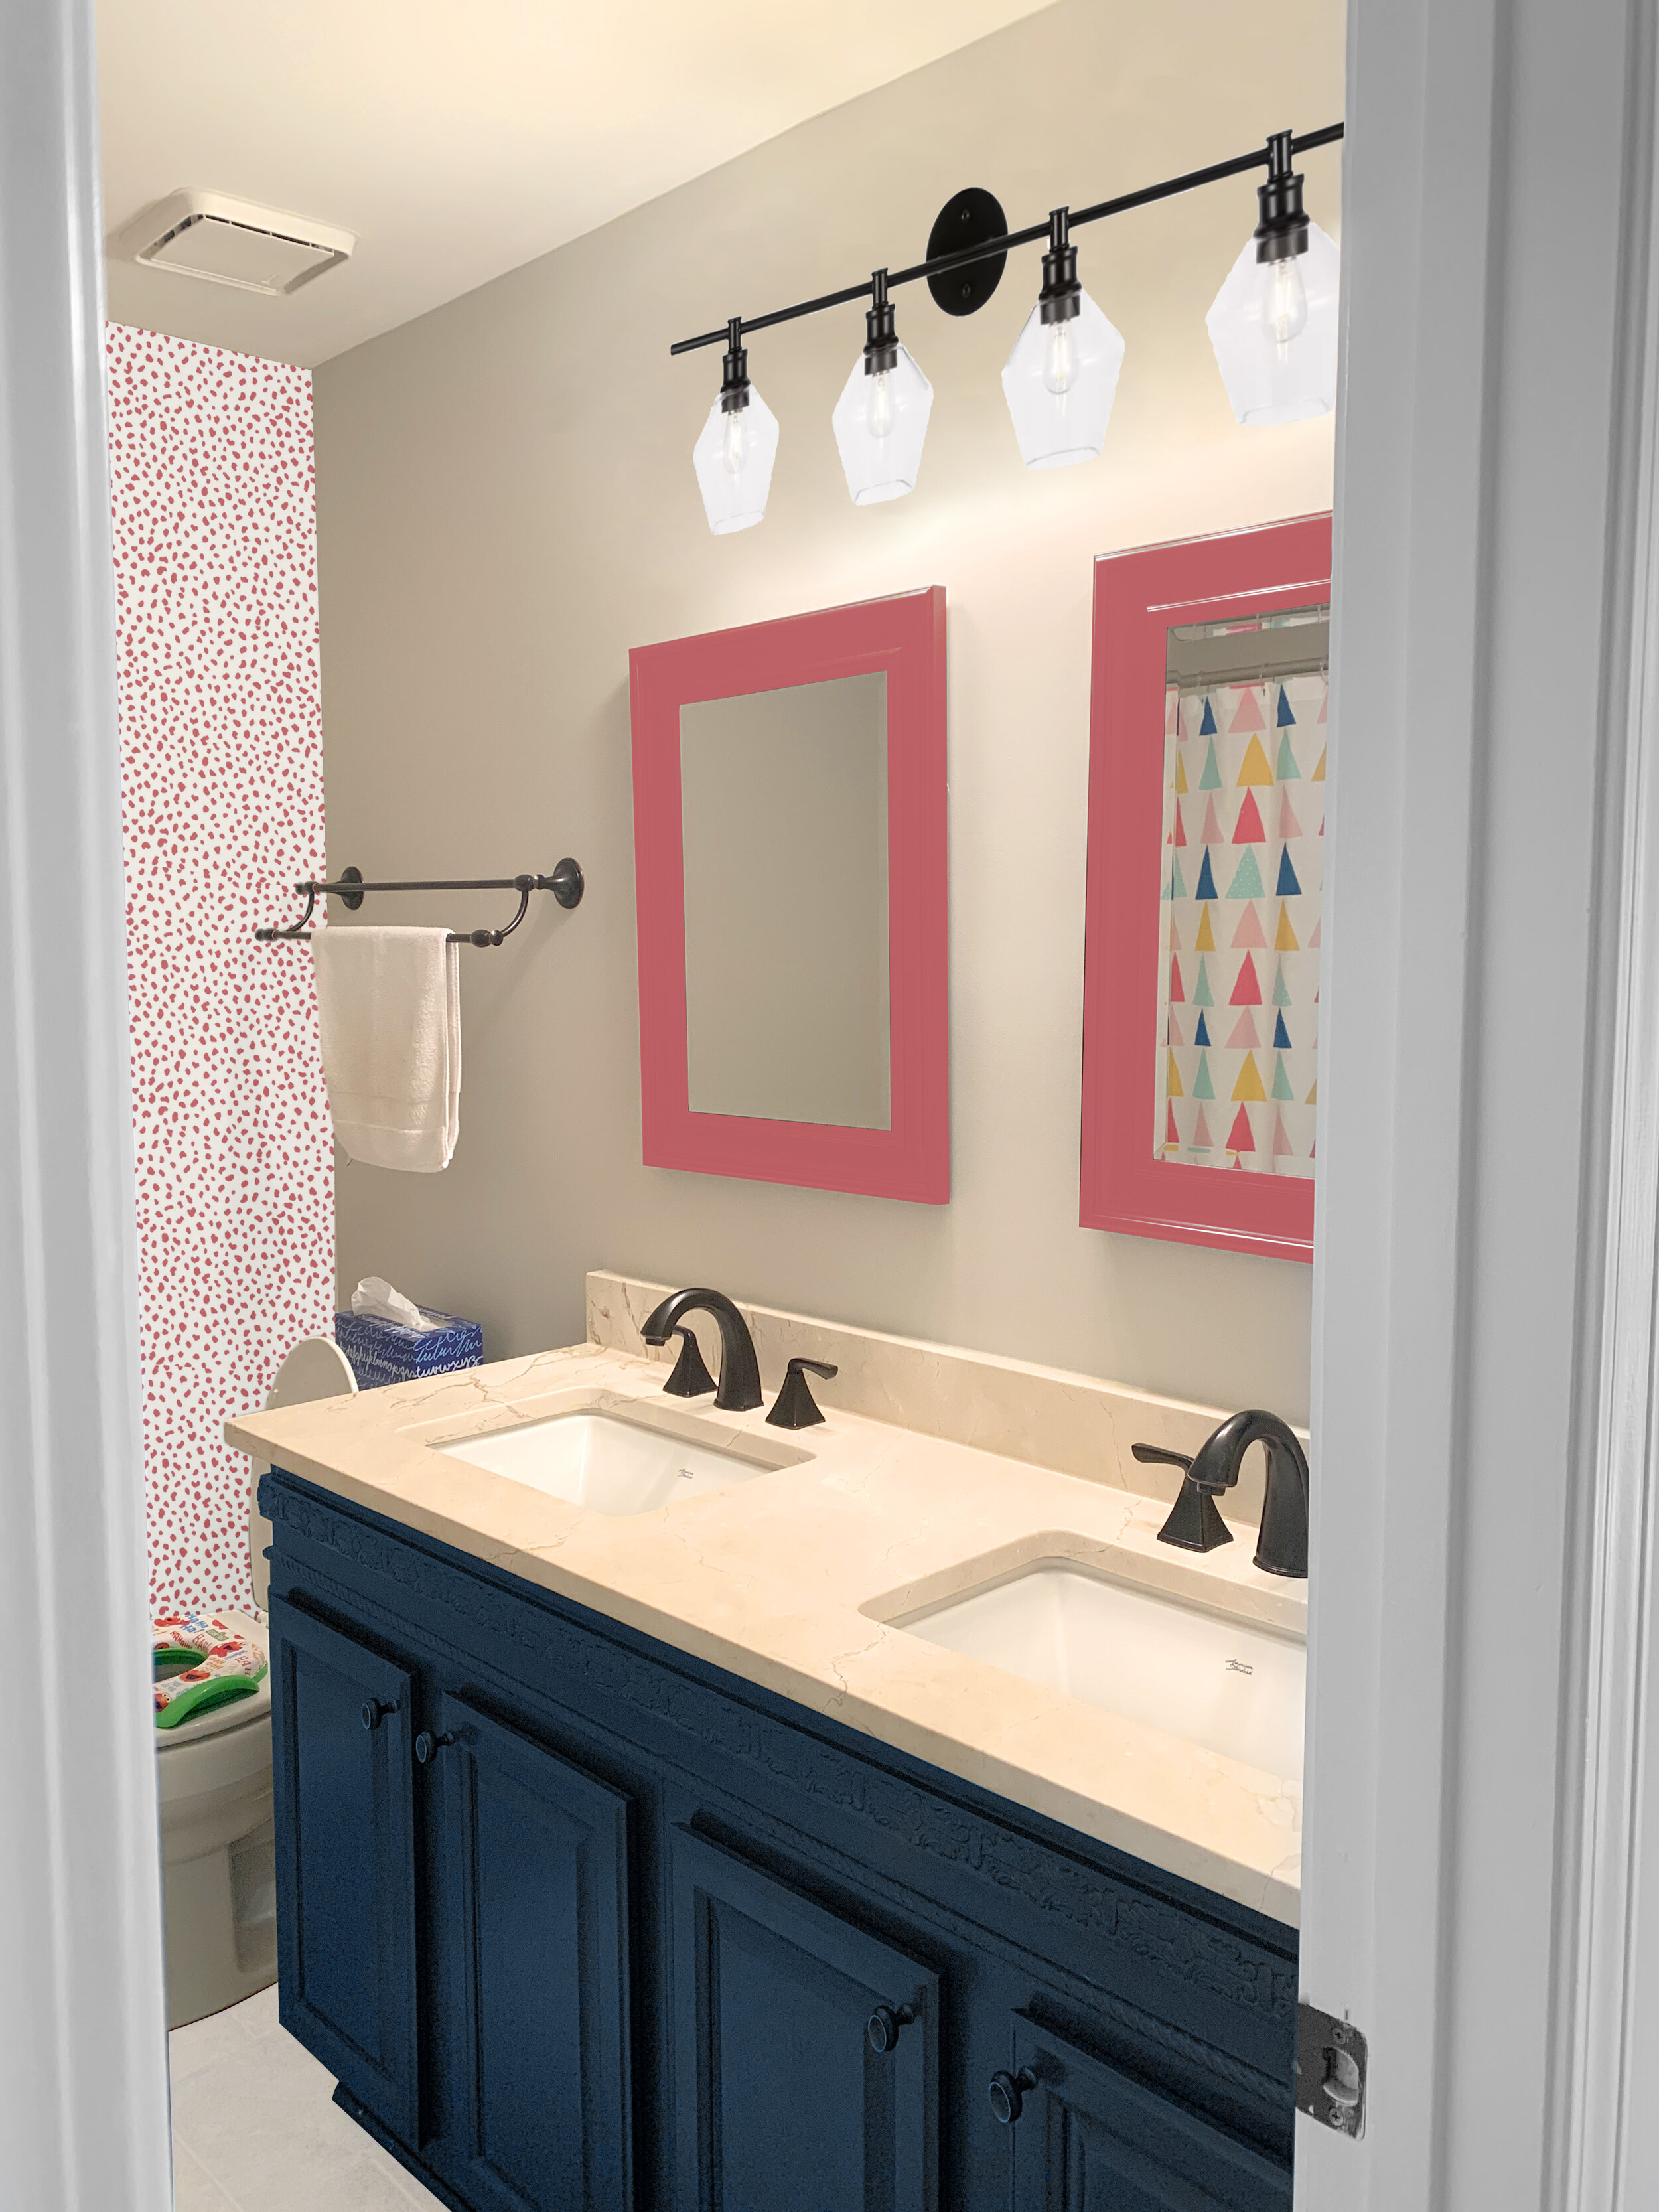
Once the wallpaper was up, all that was left to do was clean, hang artwork, hang the new towel rod, and bask in the beauty of a more fun room. I got these bathroom accessories from Target to match the fun colors. I also added awesome “Wash Your Hands” artwork by Jessica Hische to the art wall.
This project only cost me $377 when you take out the cost of the gifts I received from family. Including those gifts, the total project would cost less than $700. The most expensive part of the makeover was the wallpaper, and I’m SO happy with how it turned out.


The guest/kid bathroom went from this when we bought the house:

To this… and it’s so much more our style!
My daughter loves her new bathroom, and I feel like the space reflects her so much more. So here’s your inspiration for the day. If you don’t like something in your house, you can transform it with lots of work, some paint, and a limited budget!